B5 | Figured Bass
- Figured bass is a short-hand method of telling the basso continuo (e.g. organ, harpsichord) what the chord is.
- Figured bass shows the notes that are in the chord above the bass note.
- The method was used extensively during the Baroque period and even as recent as some of Mozart’s works, e.g. the Requiem.
Here simply is how figured bass works:
Fig. 1
Tonic – D minor
4-3 suspension
Chord i root position
Chord i first inversion
Chord iv root position
Chord V root position
Chord i root position with 4 (G) instead of 3 (F)
Chord i root position
The first chord is the tonic, which is D-F-A.
Counting from the lowest note (the bass note), F is the interval of a third above D, and A is the interval of a fifth above D. Therefore, the letter-name of the notes in the first chord are:
A = 5
F = 3
D
The second chord is :
D = 6
A = 3
F
This is a first inversion chord.
Notice that the dominant chord (V – chord A-C#-E) includes the seventh (G). The seventh can happen anywhere above the bass note, but in figured bass it is placed higher than the fifth. It also has a sharp (#). When you see an accidental (flat or sharp) alone, it refers to the third notes in the chord, that is the middle note of the basic triad (e.g. A-C#-E, D-F#-A, G-B♭-D).
G = 7
E = 5
C# = #
A
The quotation below is an example of a chorale harmonised by J S Bach. It was commonplace during the Baroque period to leave chords in root position with no altered notes (i.e. a common chord 8/5/3) without any figuration beneath.
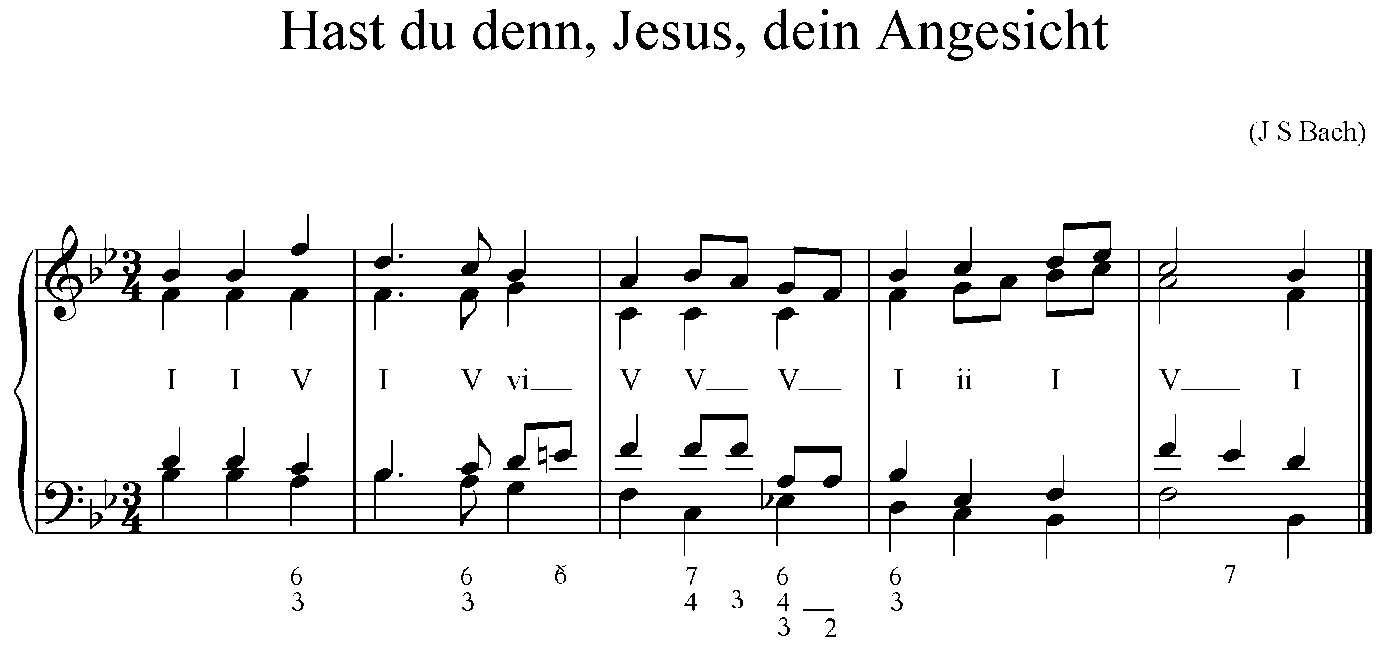
The symbol 6 with a line through it means that the E has been raised by half a tone, i.e. half a tone higher than the diatonic interval (it’s an E♭ in the key-signature).
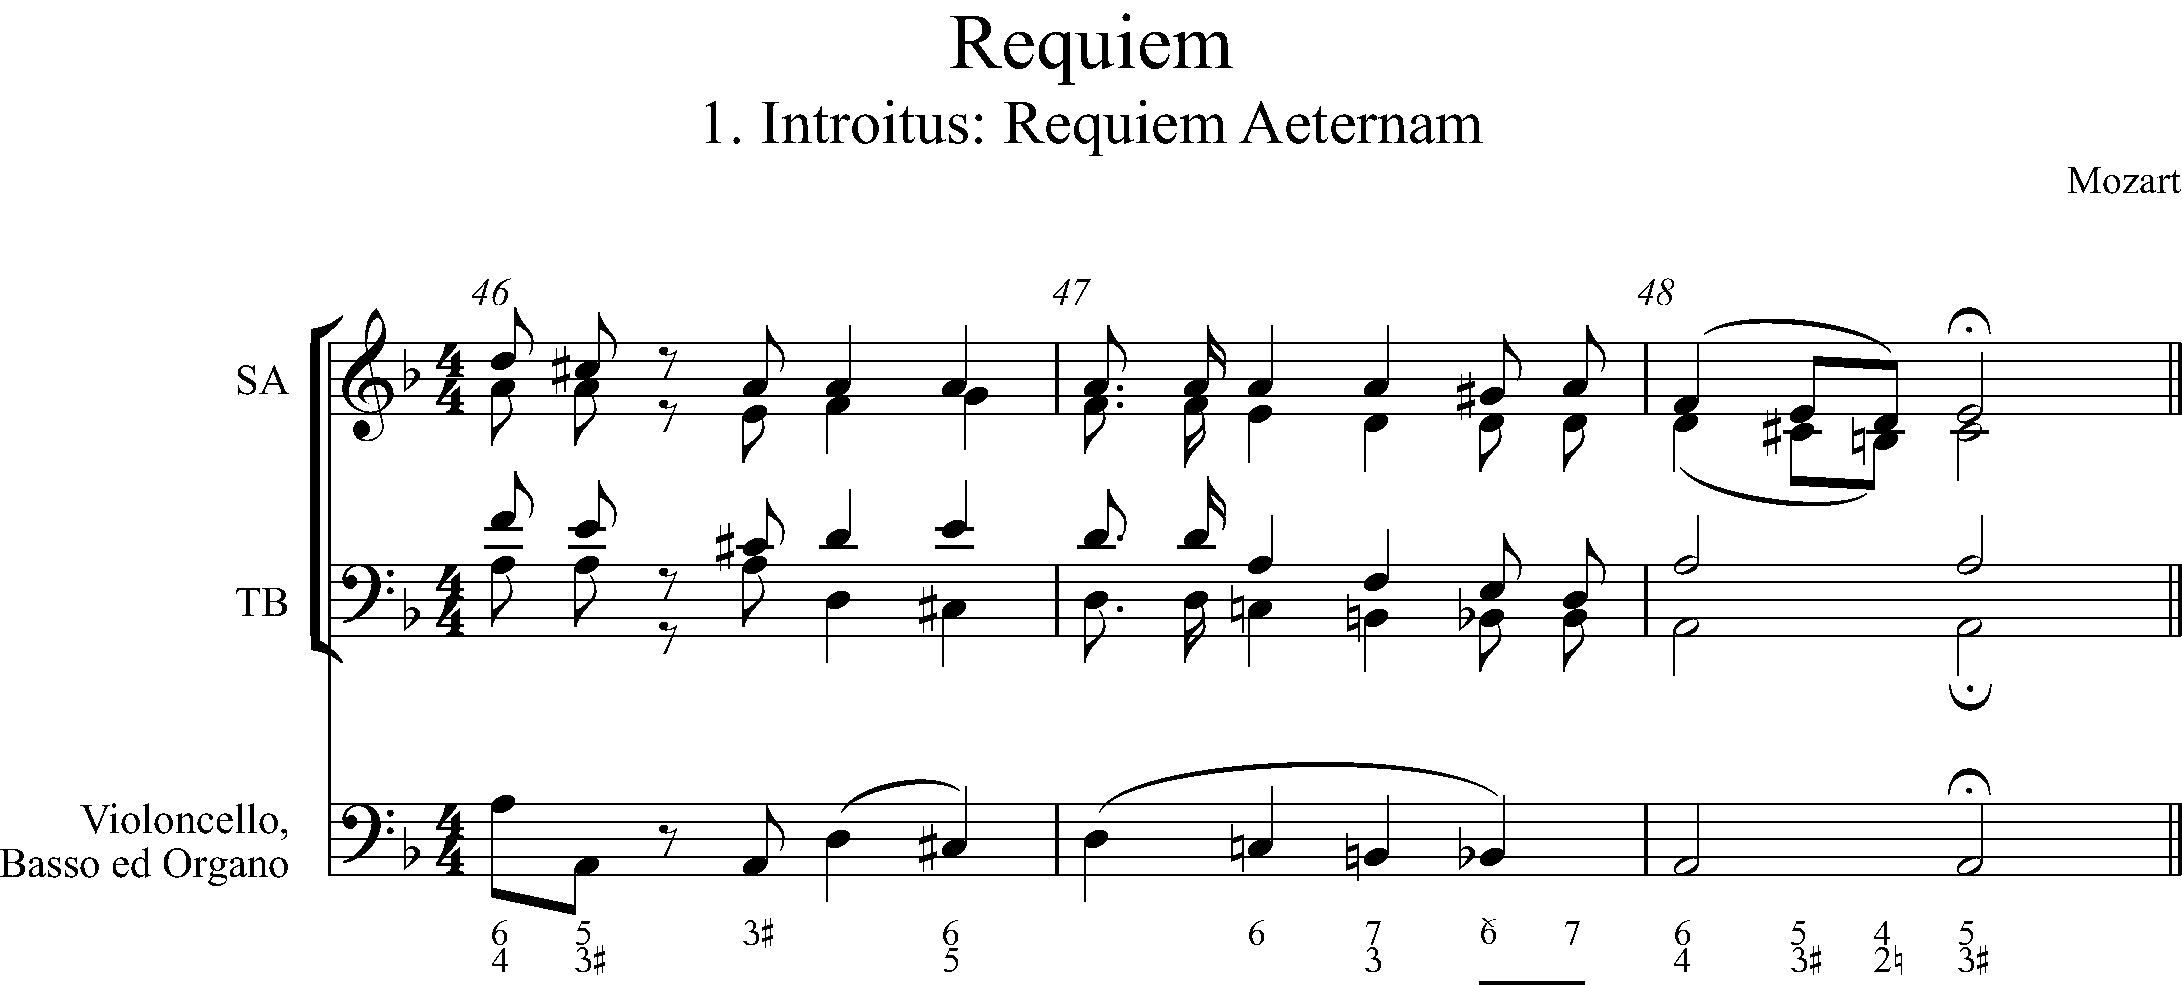
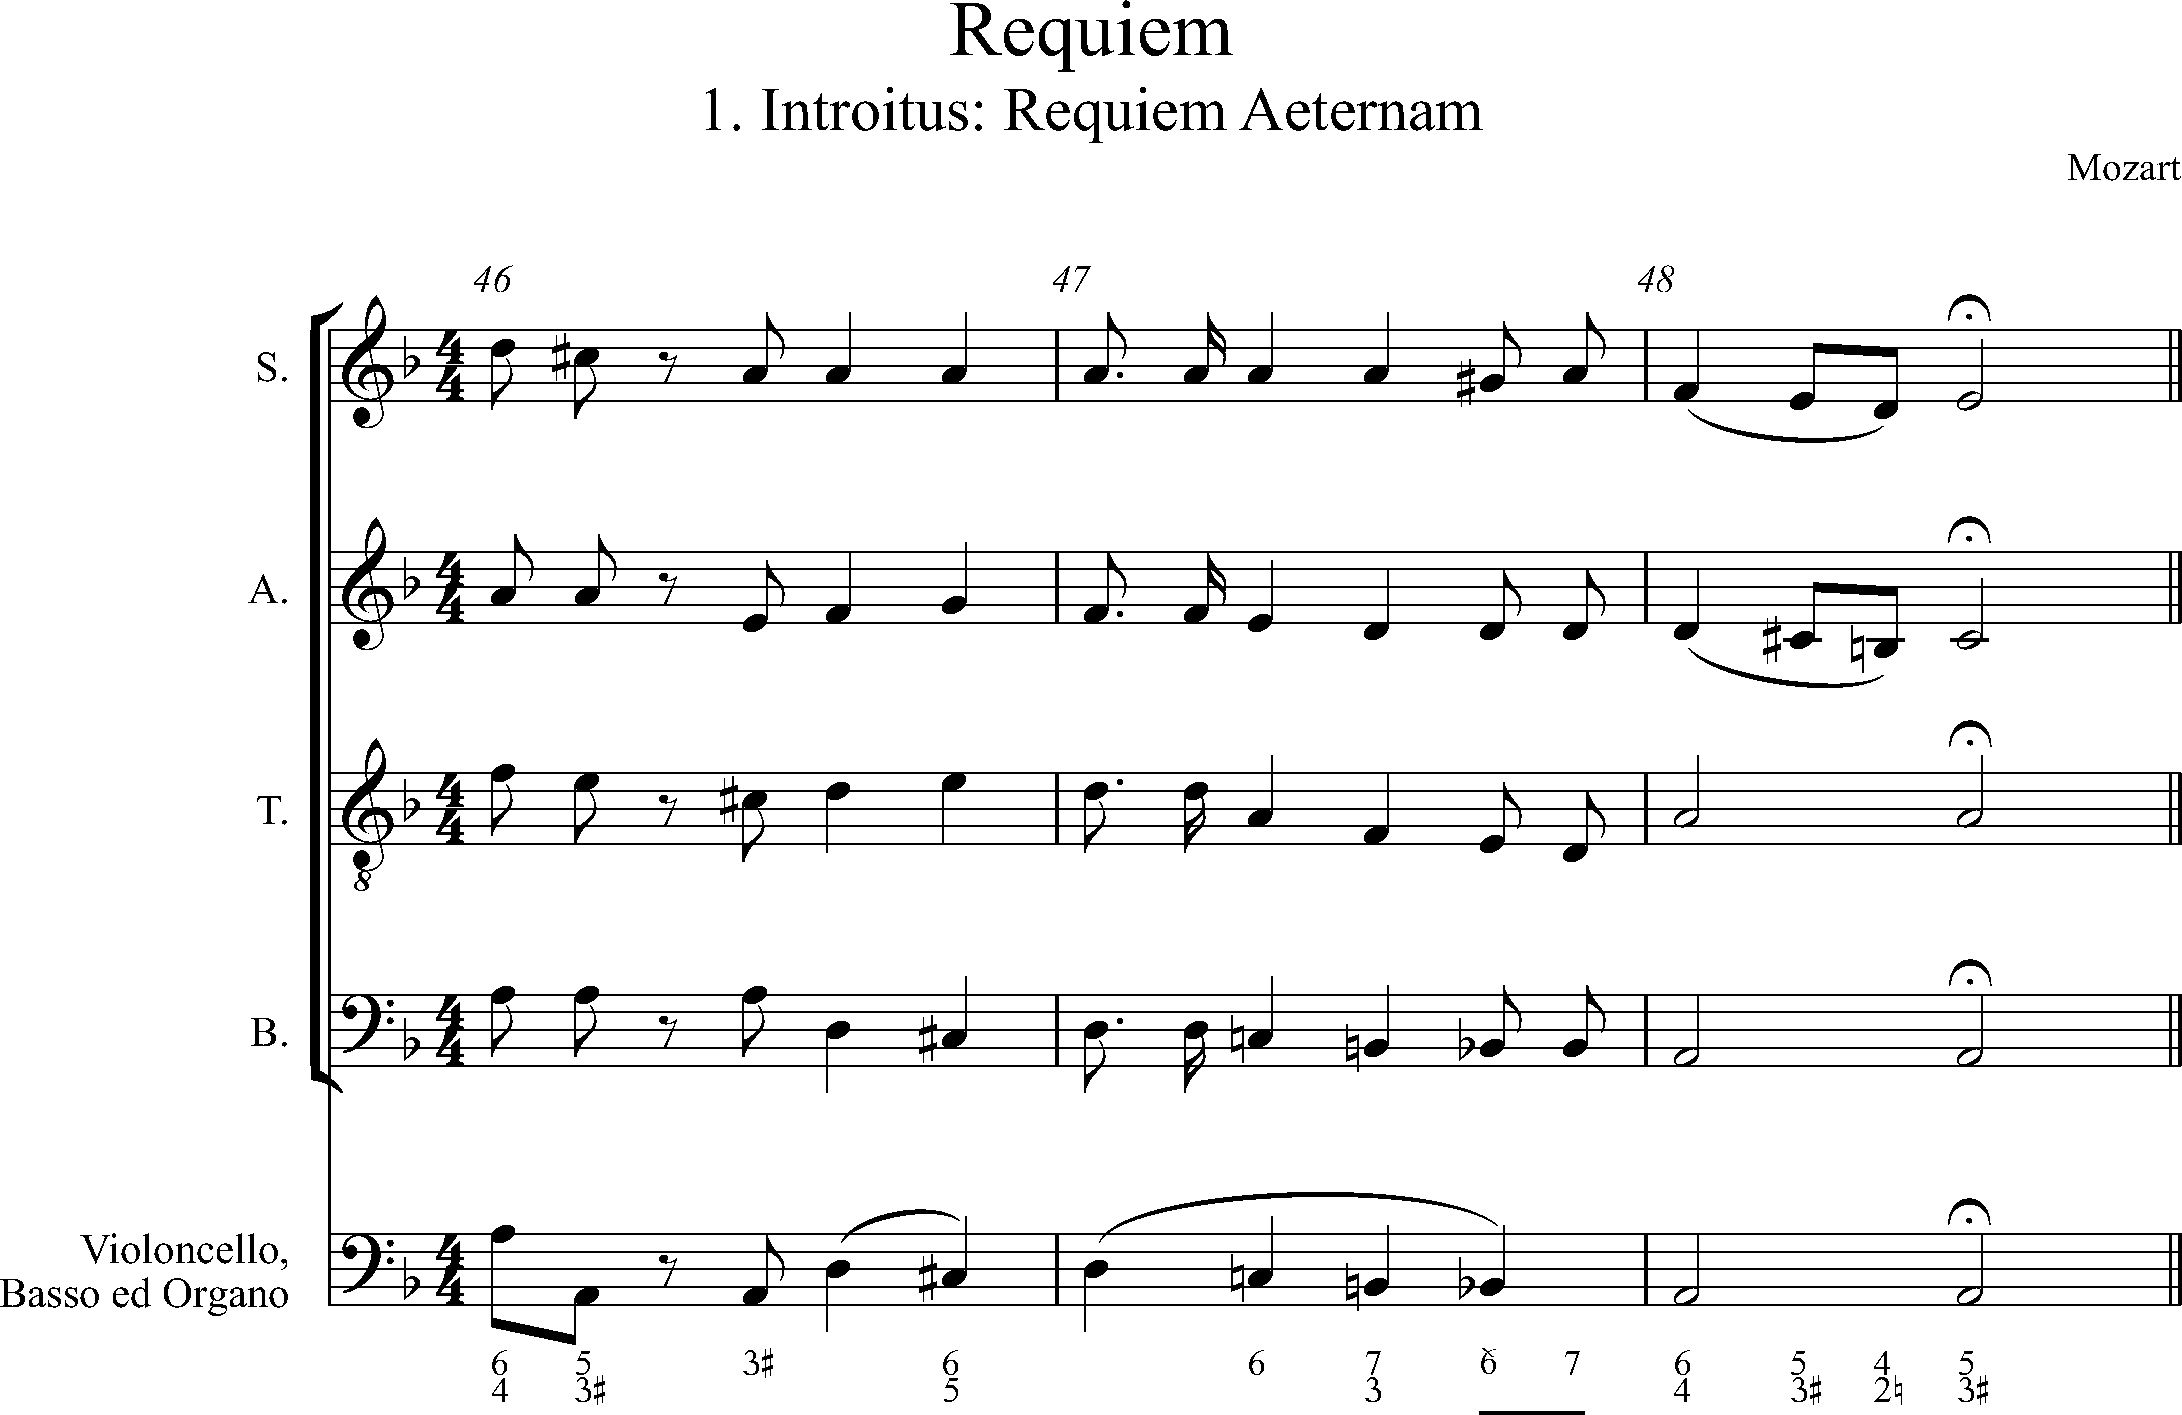
The following extract comes from the end of the first section of Mozart’s Requiem (Introitus: Requiem Aeternam). The first extract is in open score (every voice has its own line). The second is in short score format, i.e. with parts combined.
Fig. 2
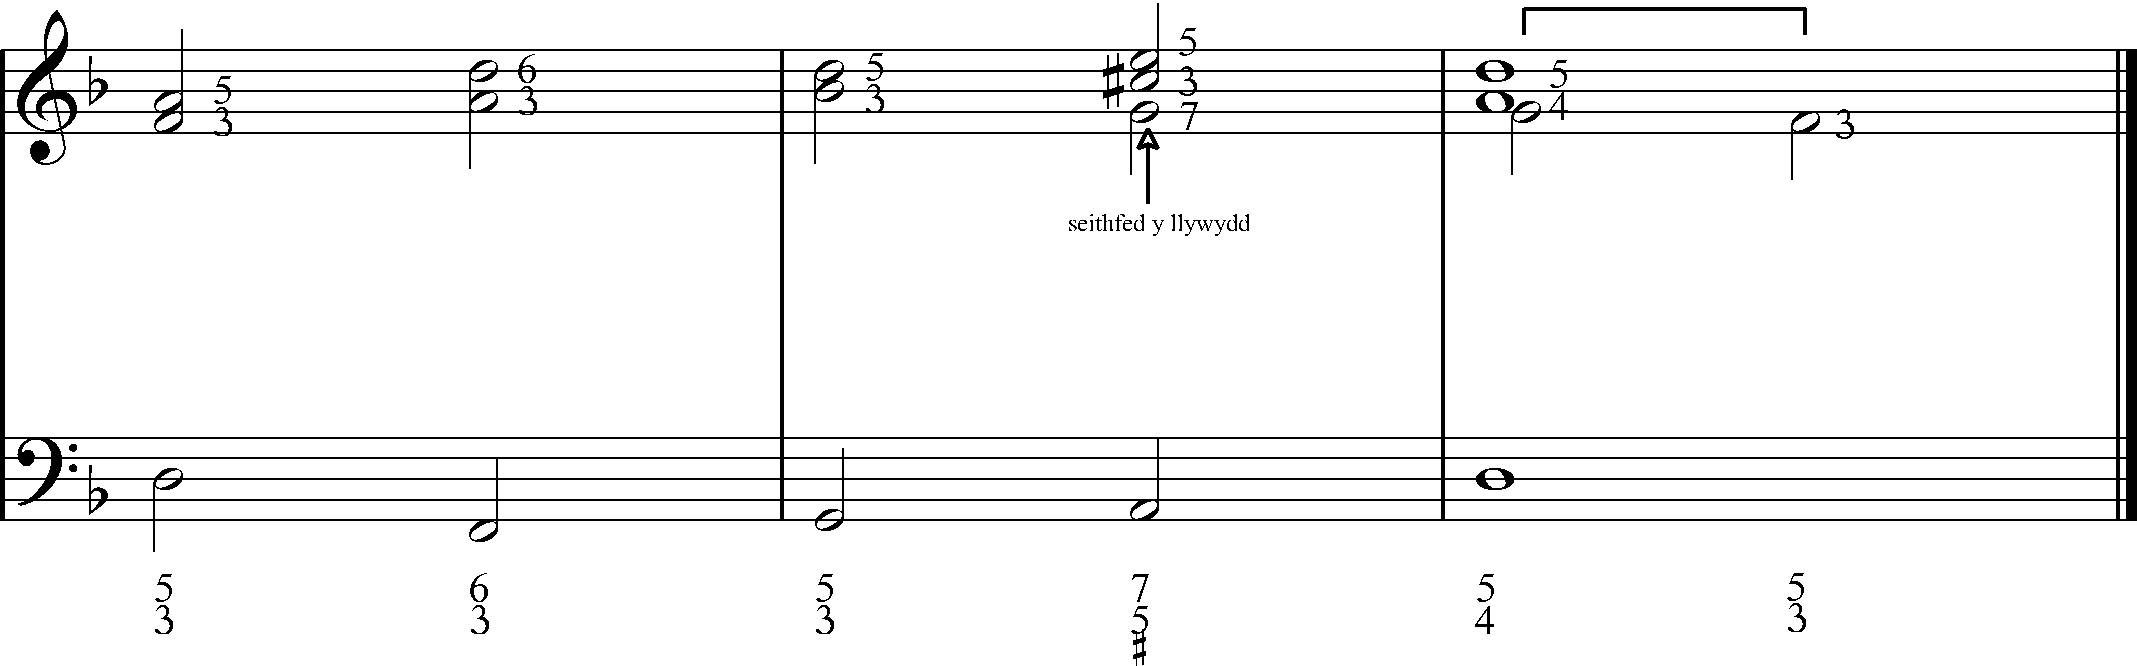
In this version, the composer has chosen to show the 3rd in the chords, though marking # without the figure 3 would suffice in other editions. The line shows which notes are held over into the next chord.
Fig. 3